Designed and Built by Hand
Every ship in The Cygnus Rift starts as a drawing I make by hand, and ends as a mesh I build by hand. In between it goes through a couple of generative tools — and none of what they make ends up in the finished ship.
What I'm going to show here is the entire process, end to end, on a new ship: a light carrier, from the first sketch to the point it's ready to model in Blender. I'll update this page with the final Blender steps as well, but we're being blocked in by the heavy fighter, which is still occupying the hangar and taking up the entire shop floor in Blender.
What the generative steps in the middle of this process can give me is speed. They can turn a flat drawing into a rough 3D block-out in about an hour or less, and that is a good chunk of a day saved, and a real fussy process bypassed.
What they can't give me is a ship I'd actually want to fly, or give to my players, so I take the block-out as a size-and-stance reference and build the real hull around it from scratch.
Future plans are to find partners, contractors, or in-house artists to do all the steps, but until then, I need all the speed I can get.
The sketch
First I draw the ship by hand in Procreate. When I sit down, I have a goal in my head. I don't usually poke around in Procreate until I have something I want to make. A lot of this has to do with time and schedule. I'm thinking about it all the time, and then when I feel — damn, I need to get this done, or at least "down on paper" as it were — that's when I sit down and draw.
When I'm done with the design, that's the design — unless I decide to change it.
We will see how this pans out when we step through the next set of stages.
The carrier sketch, start to finish.
Sketch to Seedream
After making the sketch, the design angles go to Seedream. I'll send whatever views I have. For some I only have the three-quarter view; for this one I only have top and profile.
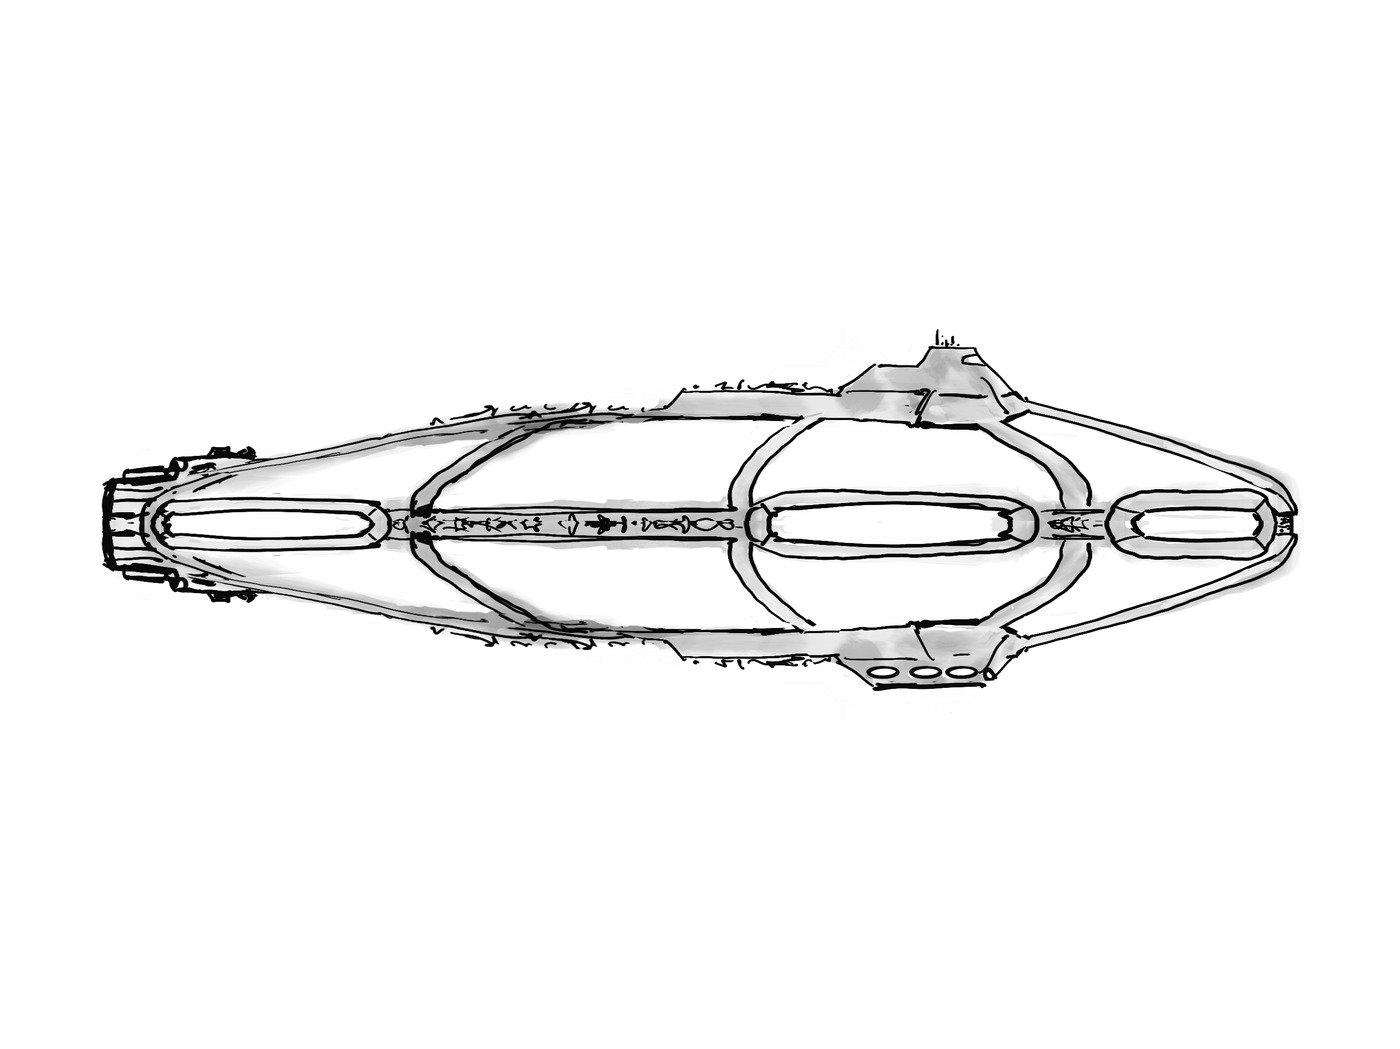
The side view of the light carrier.
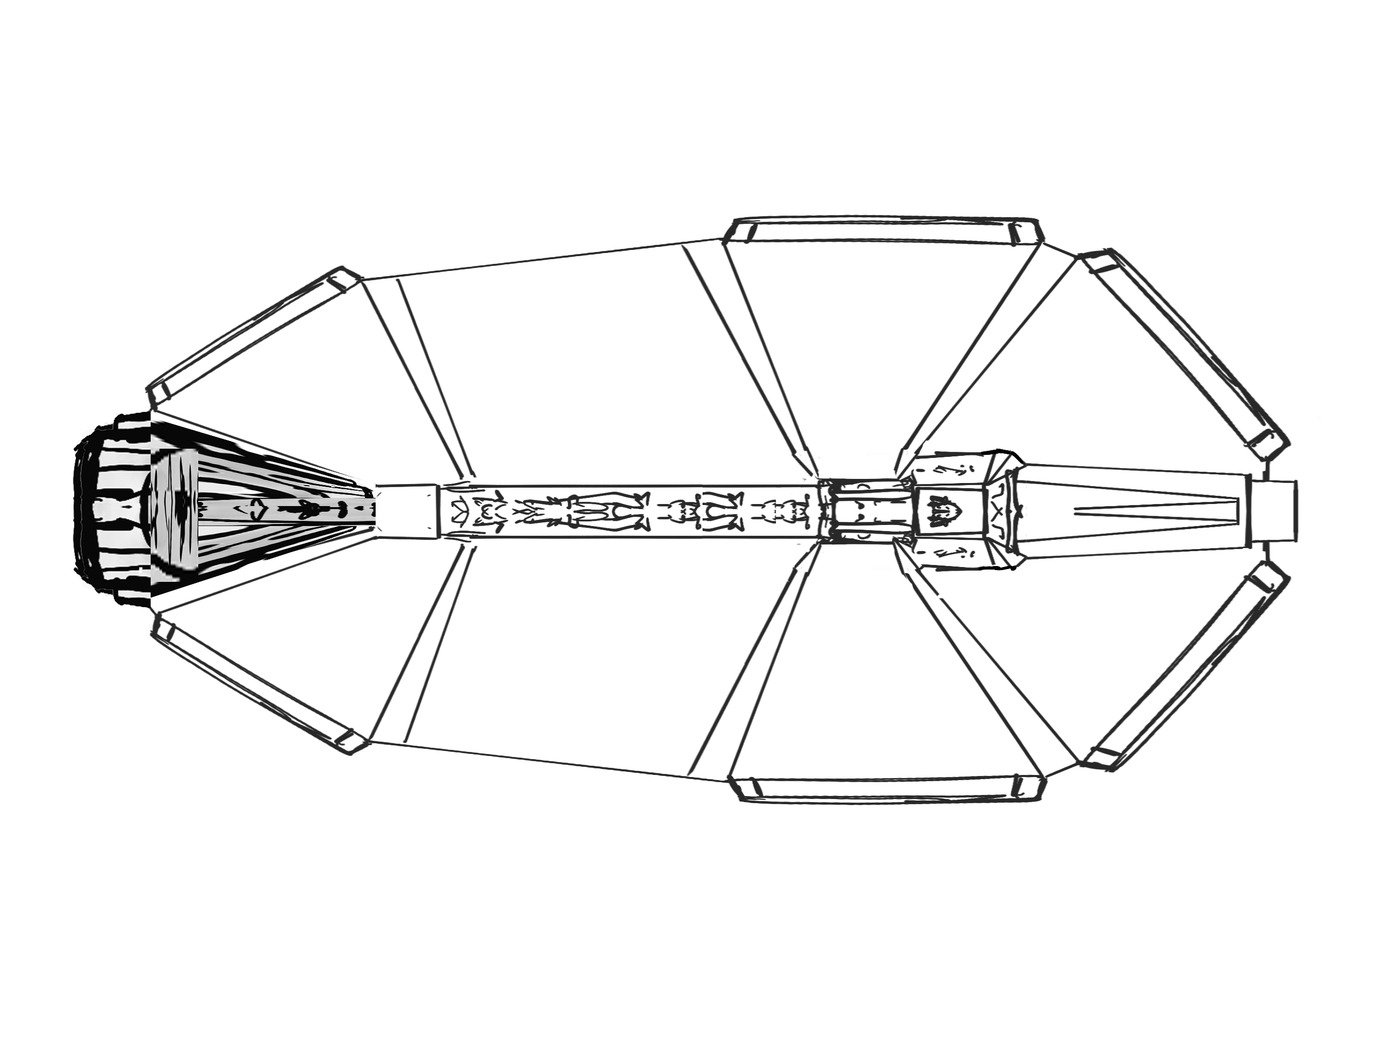
The top view of the light carrier.
Currently, I'm sending these images and the prompt directly to Seedream through Windows PowerShell by editing a code snippet. I have plans to add this to my "Hub" — a dashboard for controlling things like Flow Production Tracking, creating reports, and other functions.
Seedream takes a few minutes and returns an image. In this case I ran it a few times.
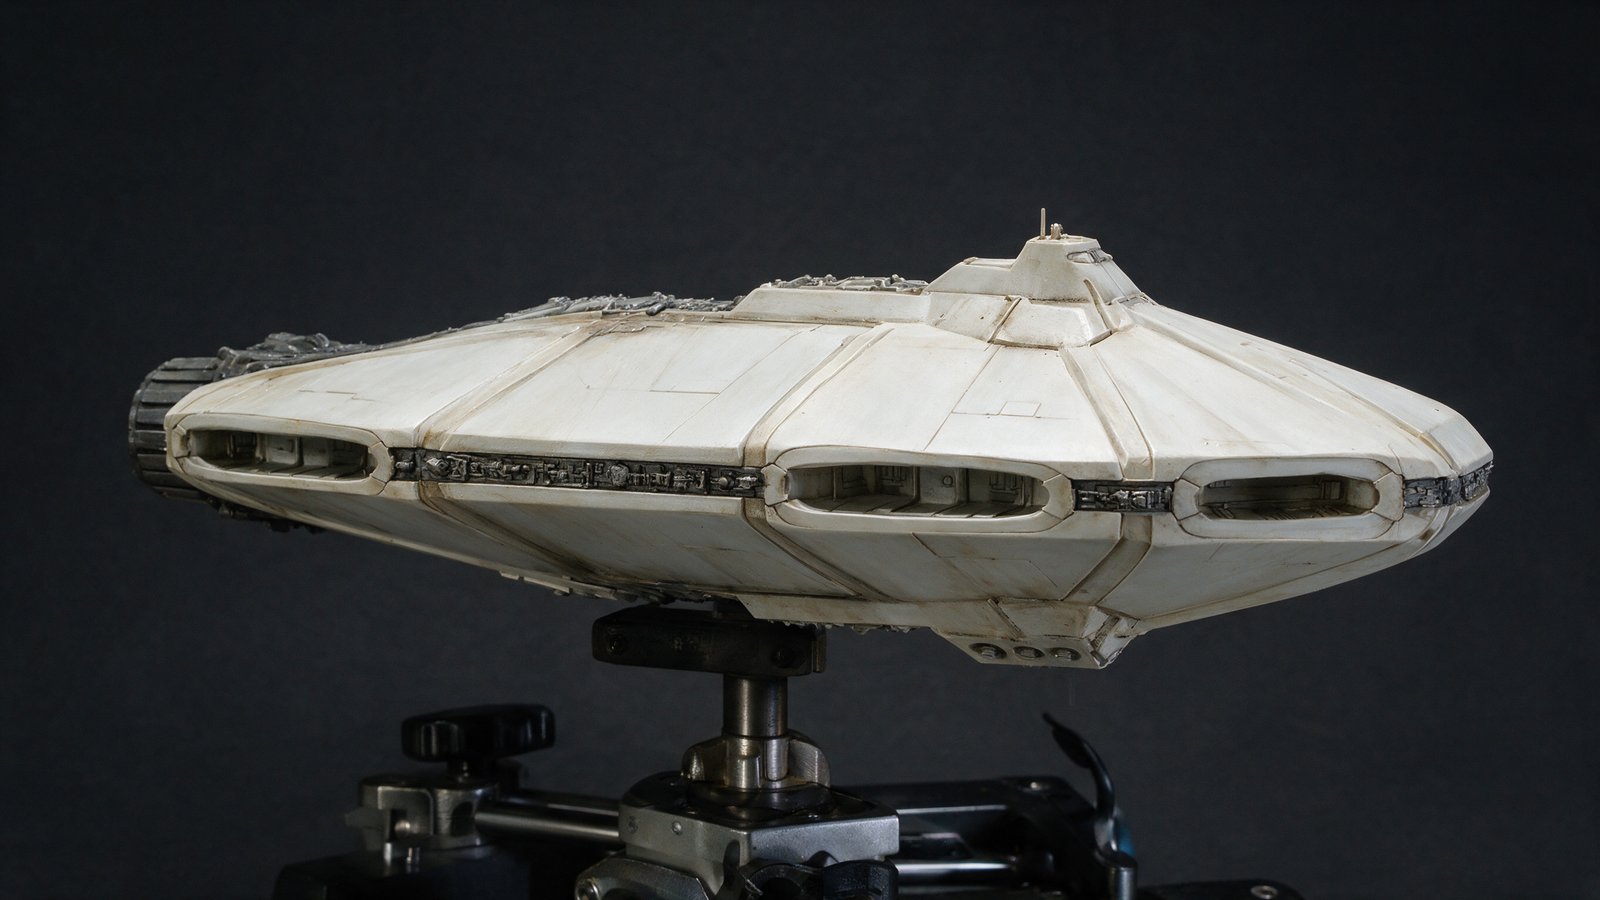
Seedream's version of the sketch — version A.
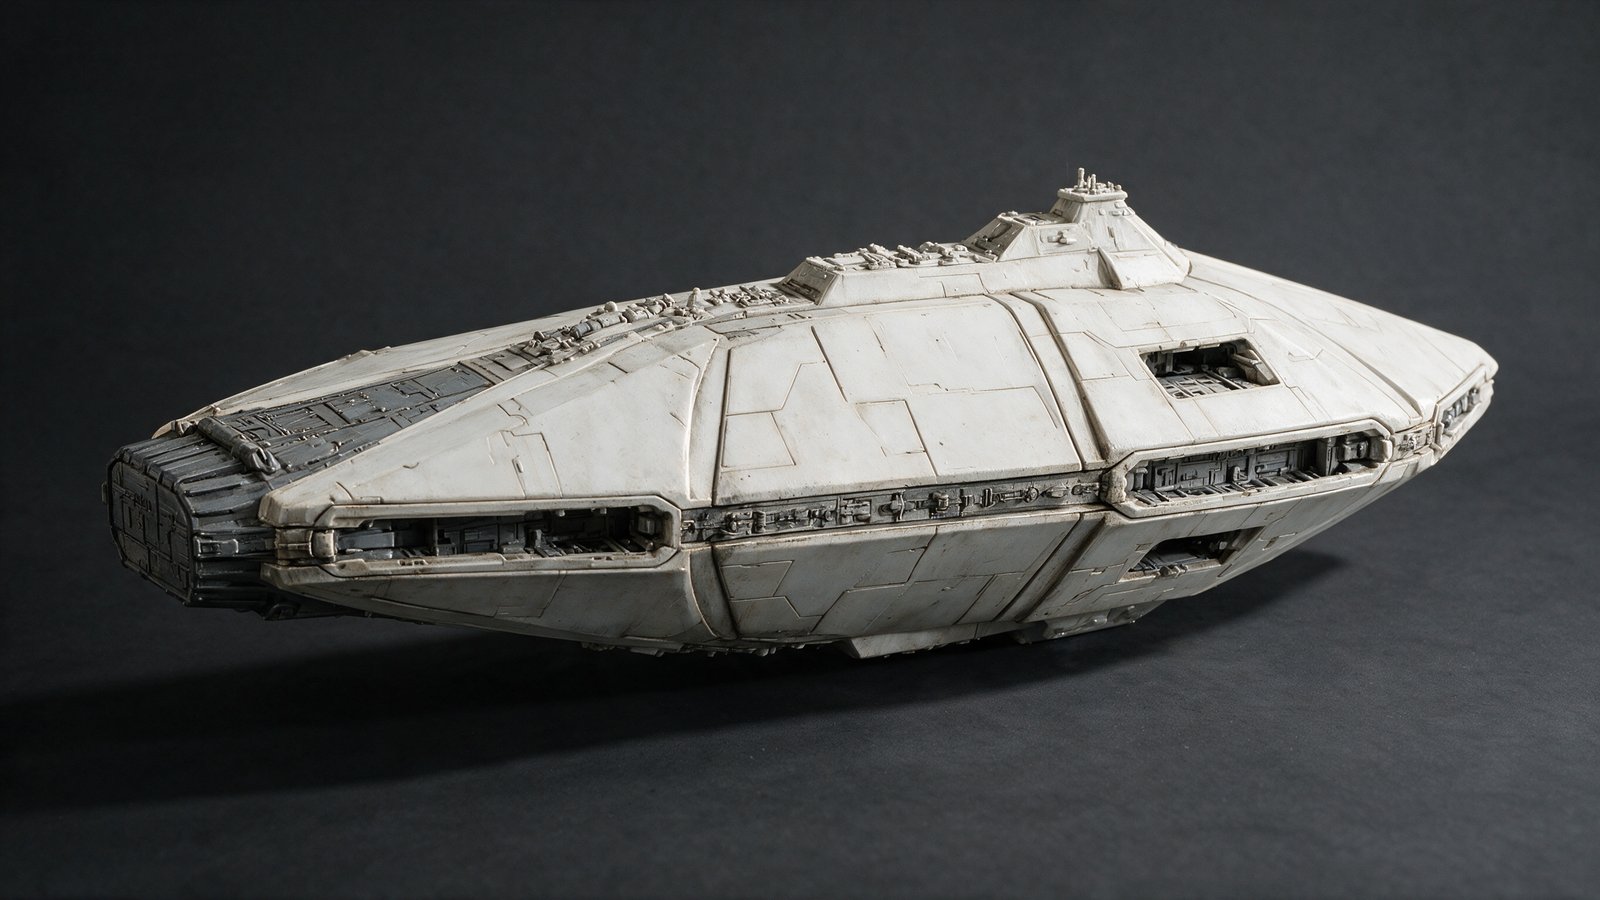
Seedream's version of the sketch — version B.
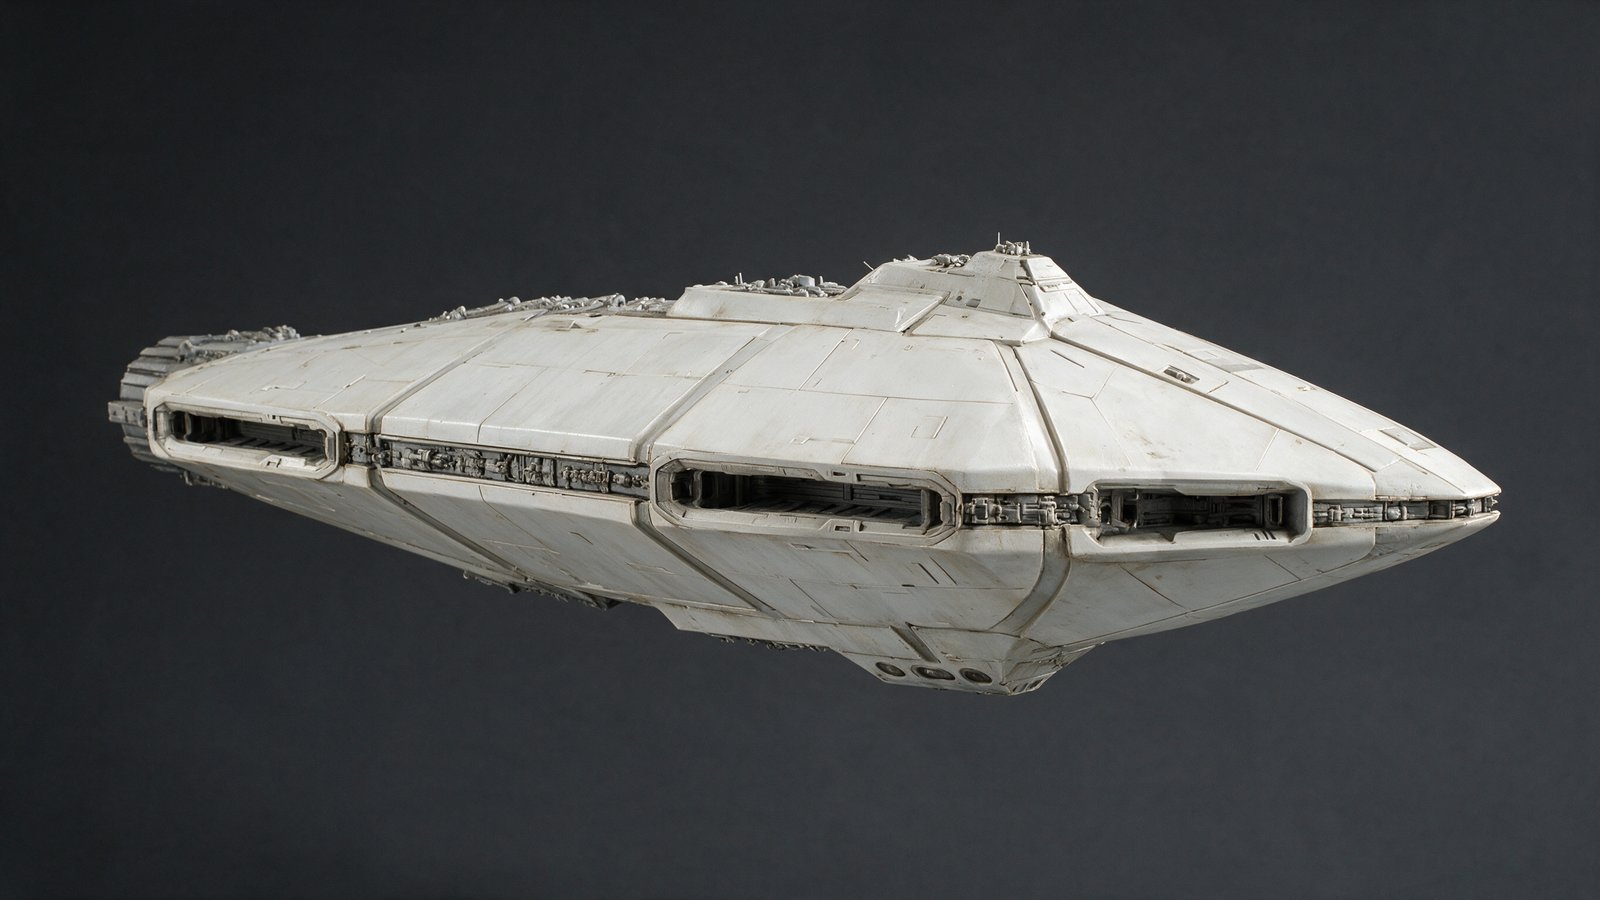
Seedream's version of the sketch — version C.
Each of these "resembles" the sketch, some more than others, and to be fair, these sketches are quite thin on detail.
I do find that spending more time on the sketches can give better results — but — in balancing "Return on Investment" (ROI), none of the images from Seedream are 100% what I want, and this process is to get a mass for Blender, and it's often just easier to use the mass to create my design and fix it in Blender.
In our case, Version A — the first one — most resembles our sketch, so we'll proceed with Version A.
Seedream to Photoshop
I don't always have to do this step, but from my brief experience with Meshy, if it looks bad on the image it may, and probably will, be copied into the model. There are some details I saw in my head when sketching that didn't come out in the Seedream version, so I made some adjustments and then exported the updated image.
Seedream's version of the sketch — version A.
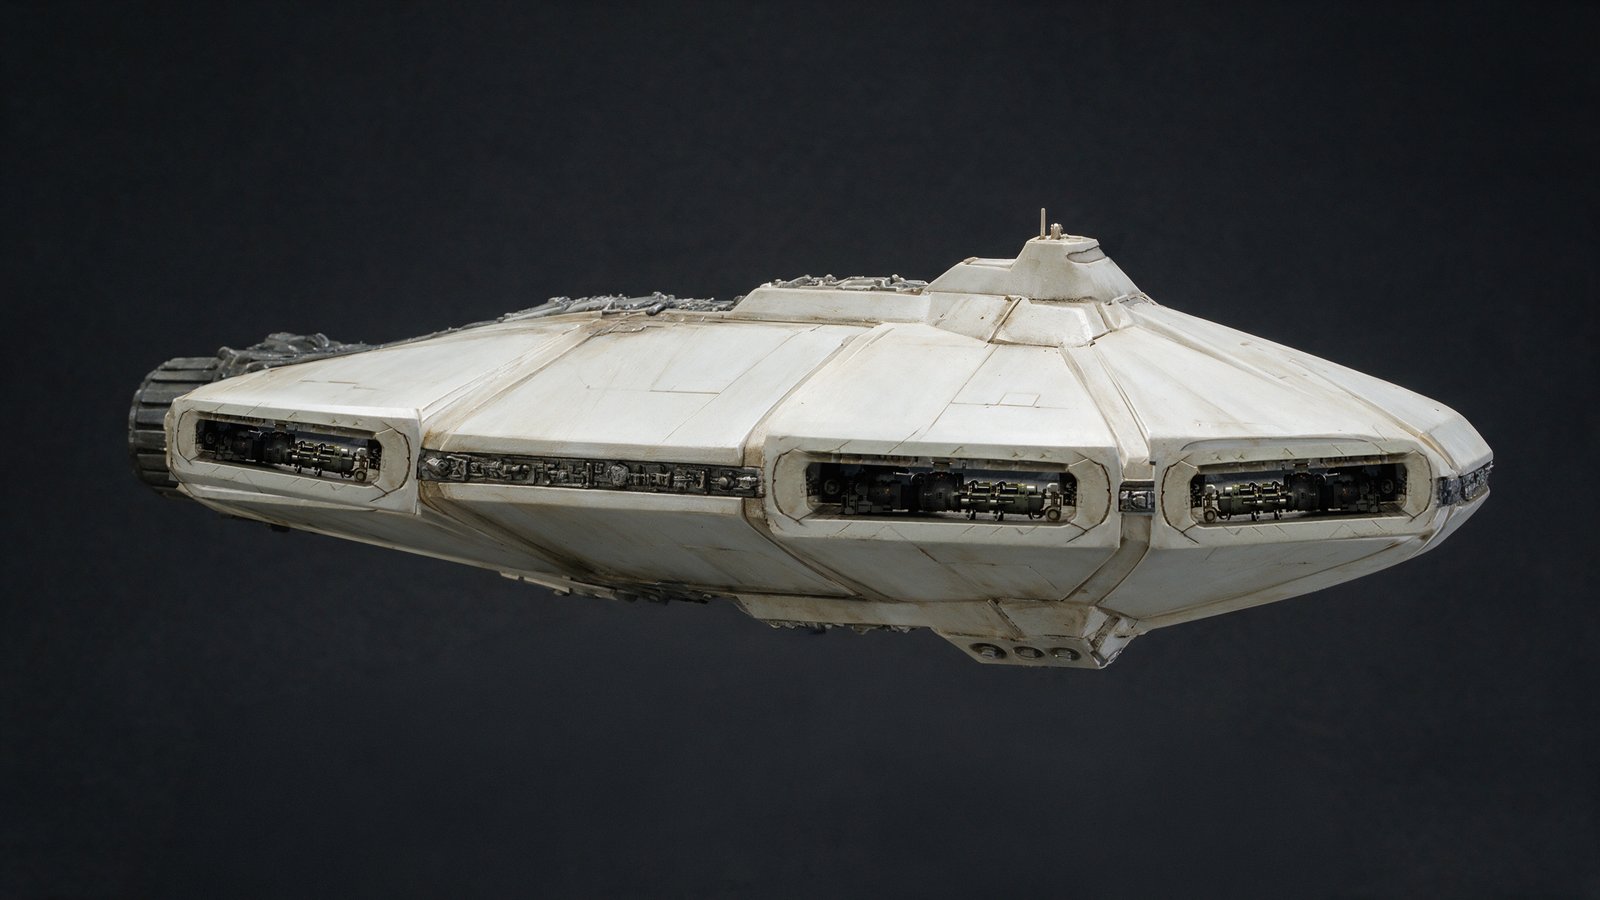
My Photoshop update to that Seedream concept.
I straightened some lines, tried to regularise the bays, and enlarged the bay entrances by raising the shell and expanding the height of the ship in those areas to emphasise the fact that the docking bays are more important than the rest of the ship. I wanted the ship dominated by the docking bays.
Photoshop to Meshy
Next, I give the art to Meshy. I'm just using one image here. I can use up to four, and it can help, but the images are designed for things like figurines or characters (left, right, front, back), and with ships, which usually need profile, plan, and beauty to define them, it can hinder as much as it helps.
In this case I gave Meshy the Photoshop "fixed" version from the last step.
My Photoshop update to that Seedream concept.
Meshy allows "re-rolls", as they understand that there is an interpretive step going on. Like a lot of these generative systems, it either gets it or it doesn't, and that is usually evident from the first render. This was true in this case as well, and like Seedream, the first output was the best output. Partly for the sake of this log, I did use all my re-rolls and downloaded each mesh before moving on.
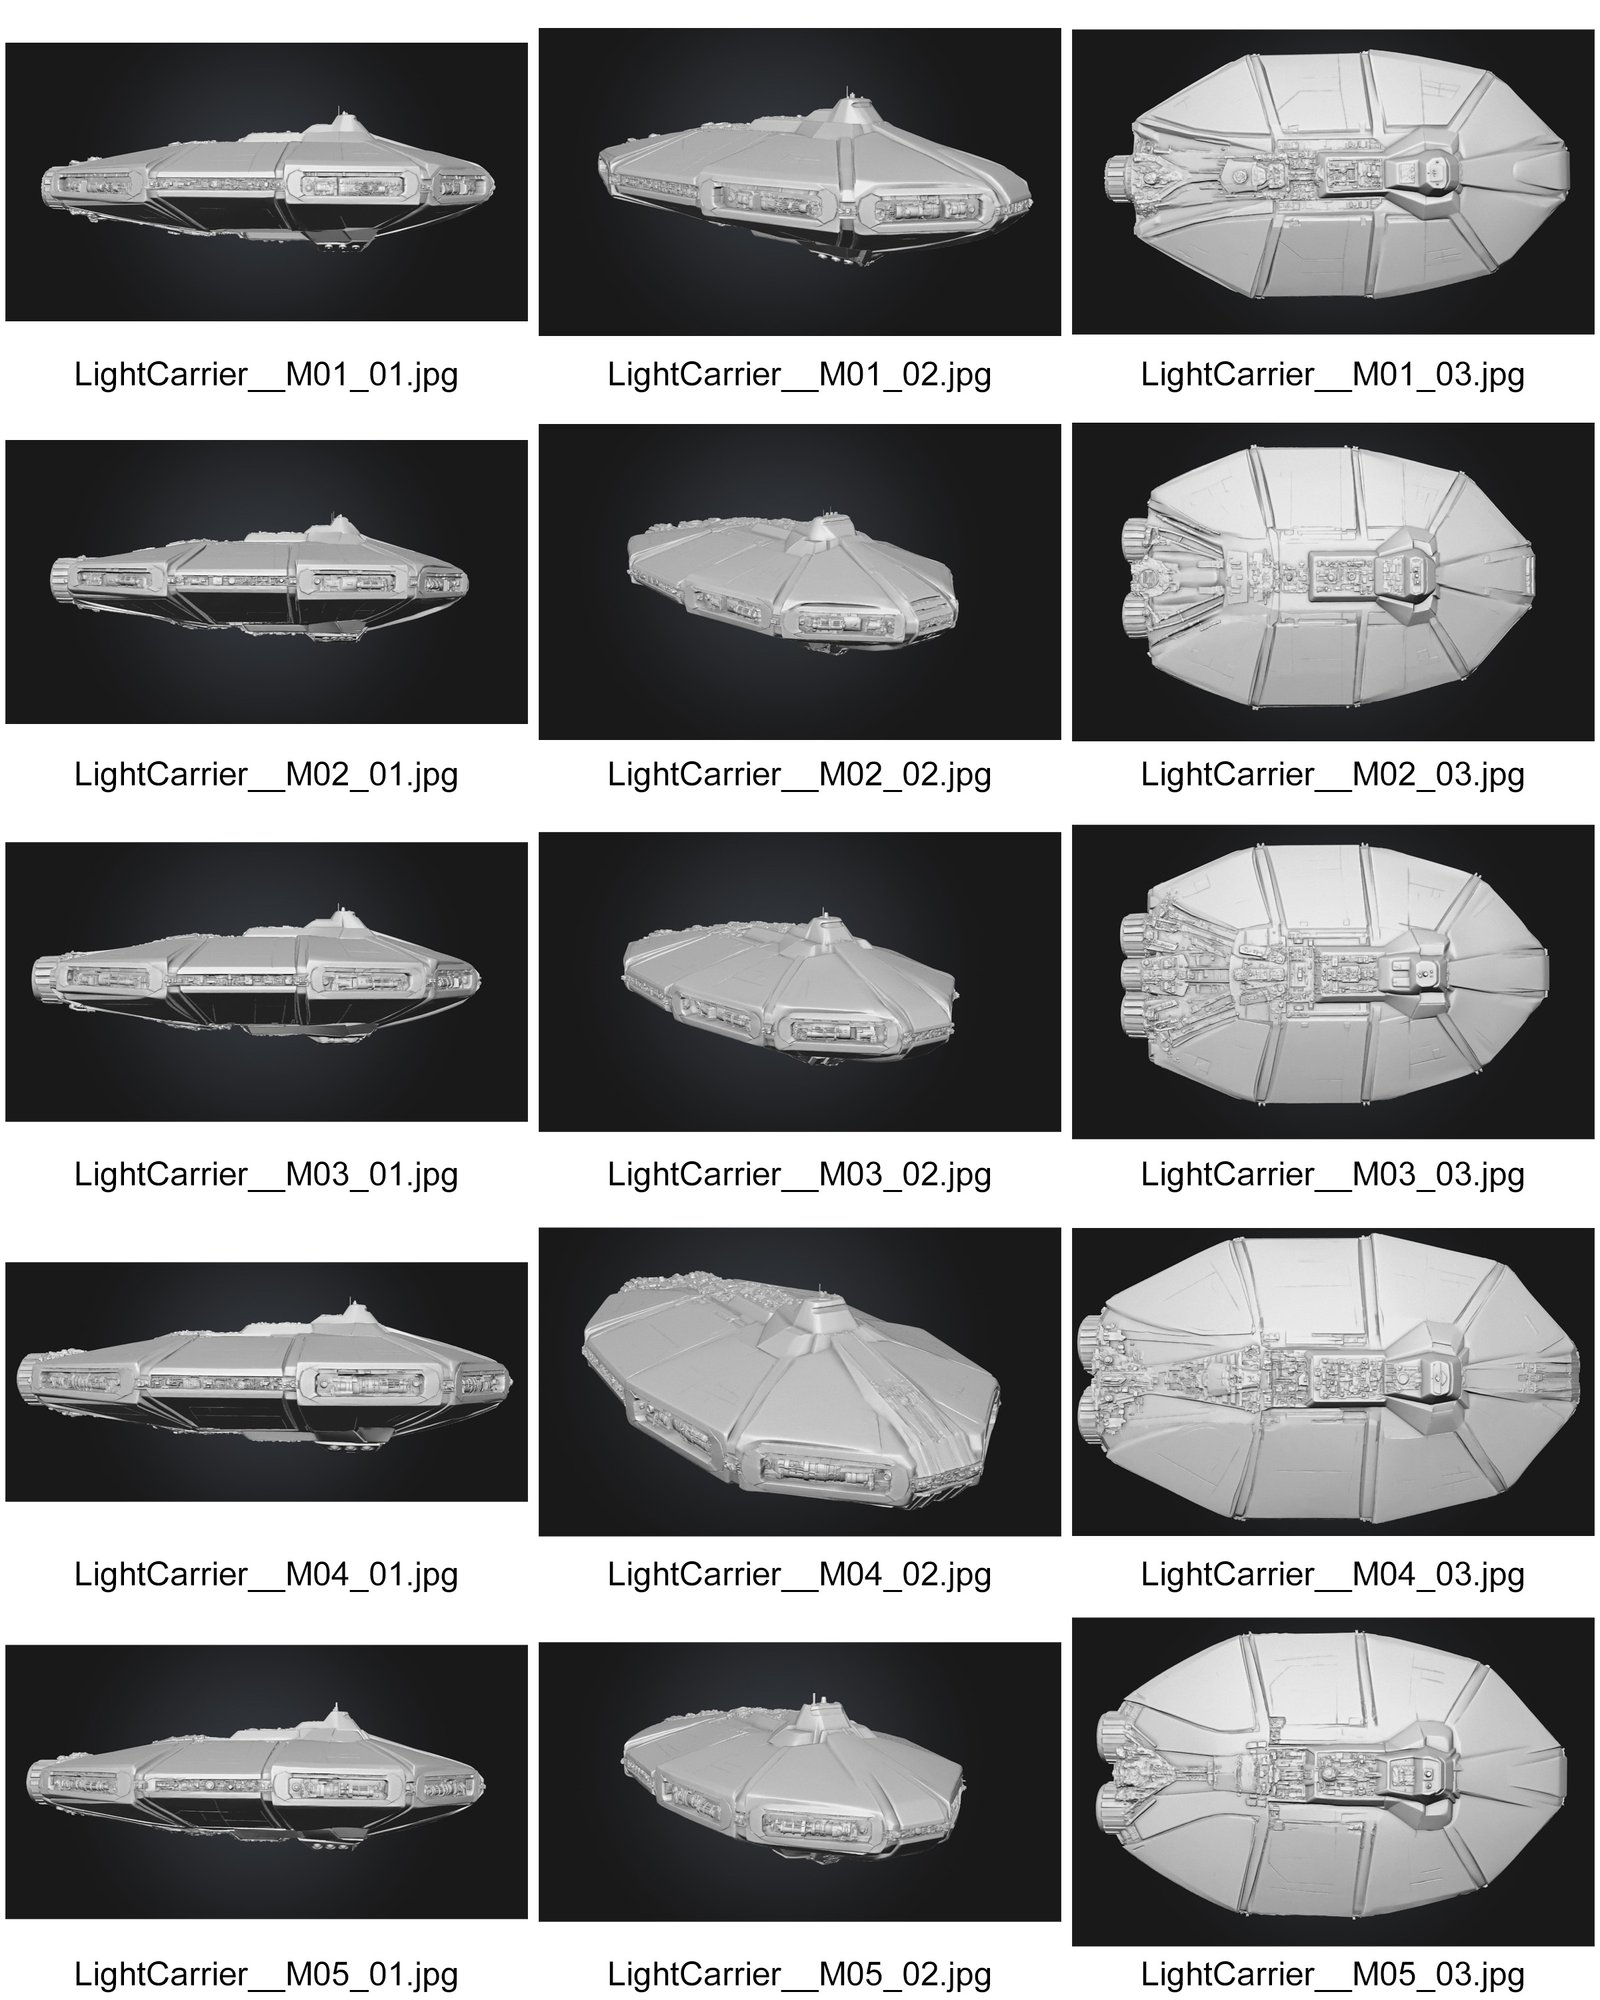
A contact sheet of screen captures of each pass.
Normally I wouldn't bother with the extra passes once I had what I could use, nor would I take multiple screenshots… but I thought you might be interested.
The first "roll", LightCarrier_M01, was the best. Not unexpectedly, it didn't recognise the shape of the plan view. This is probably the hardest thing for the generative model to estimate from my sketches.
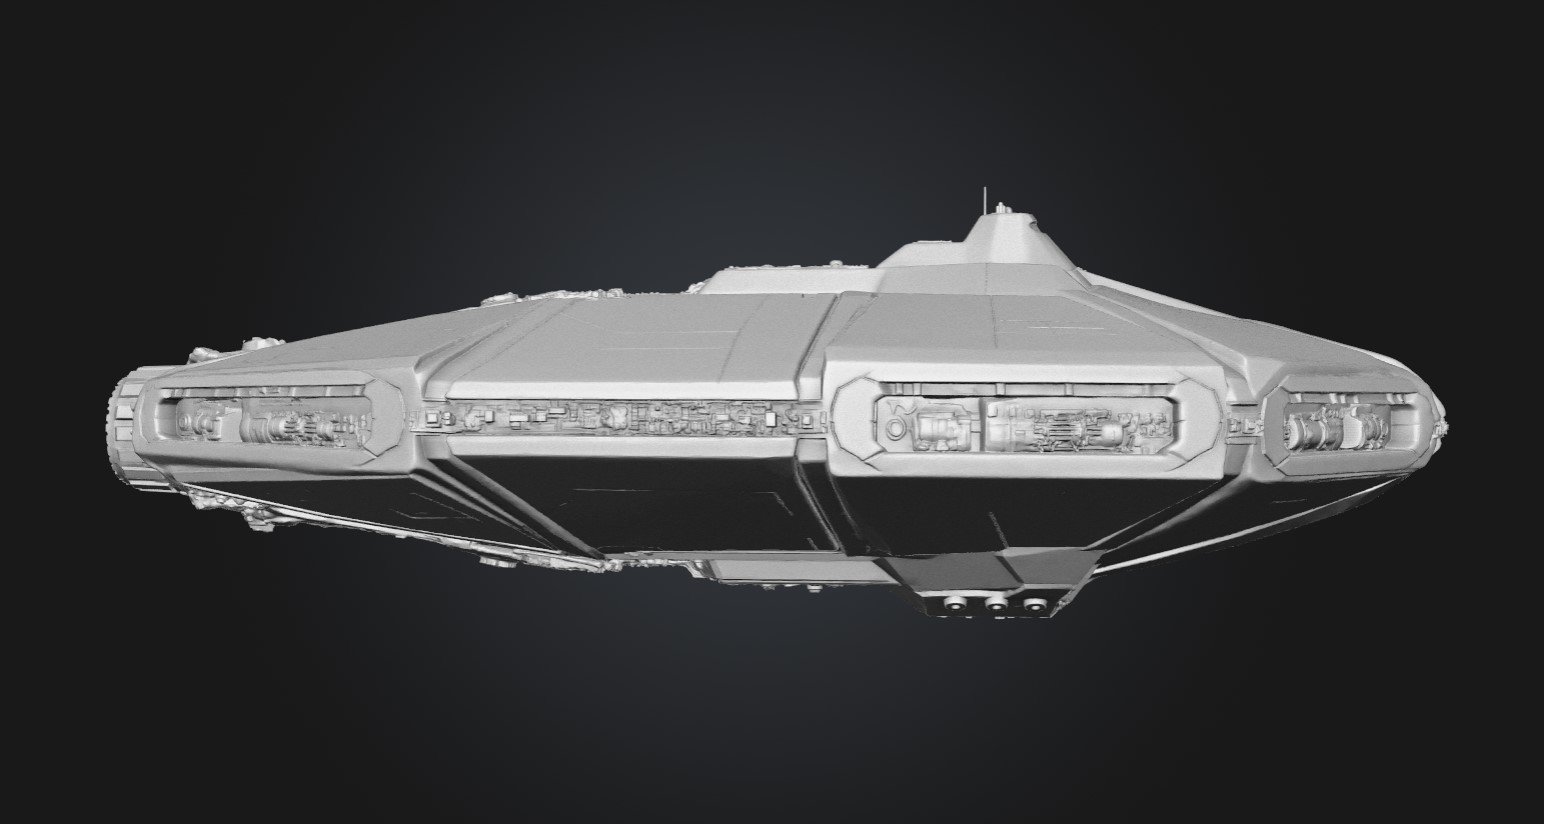
Meshy's mass — profile.
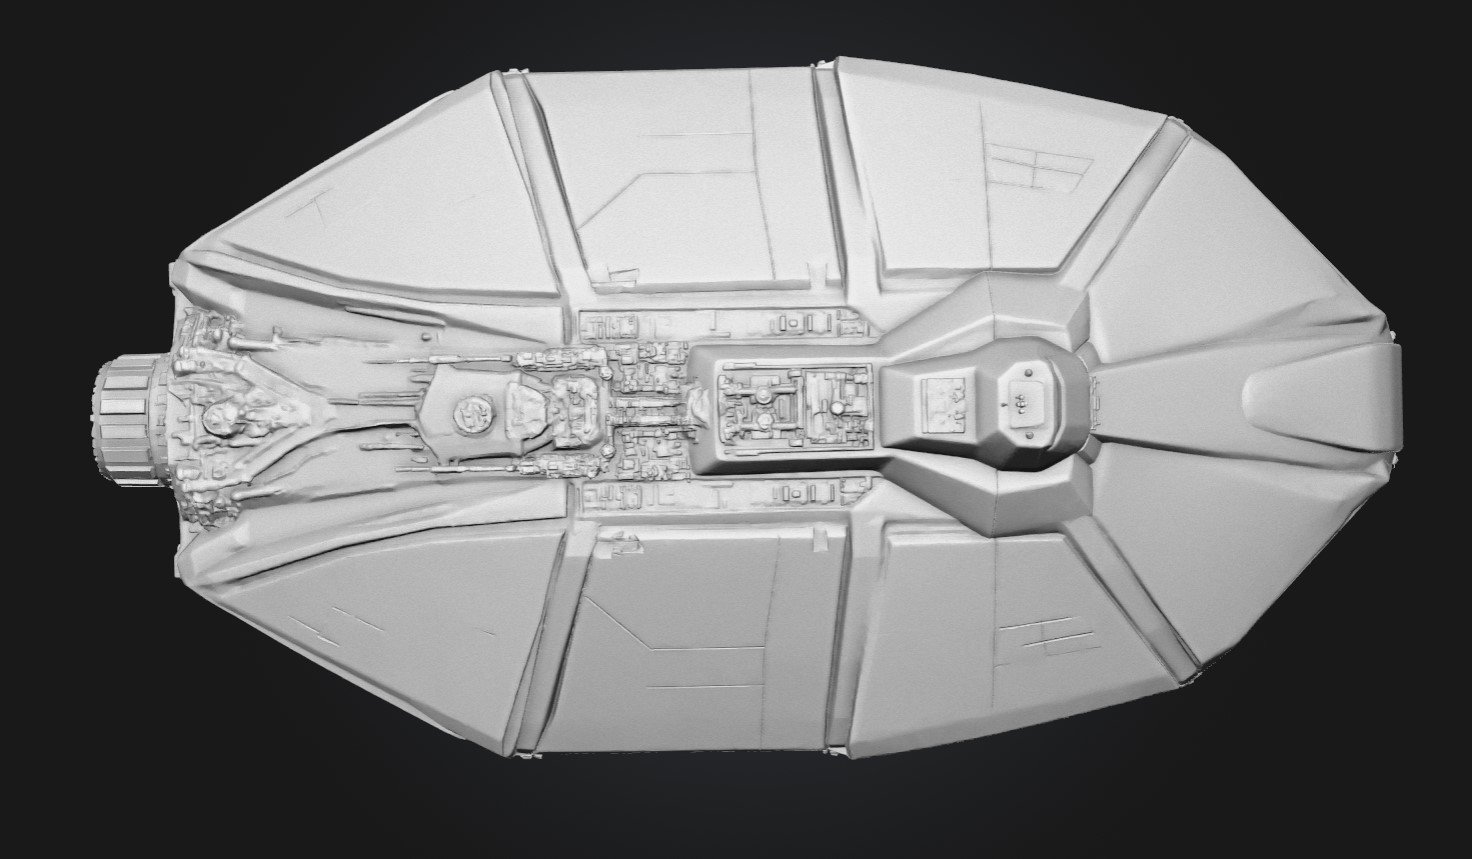
Meshy's mass — plan.
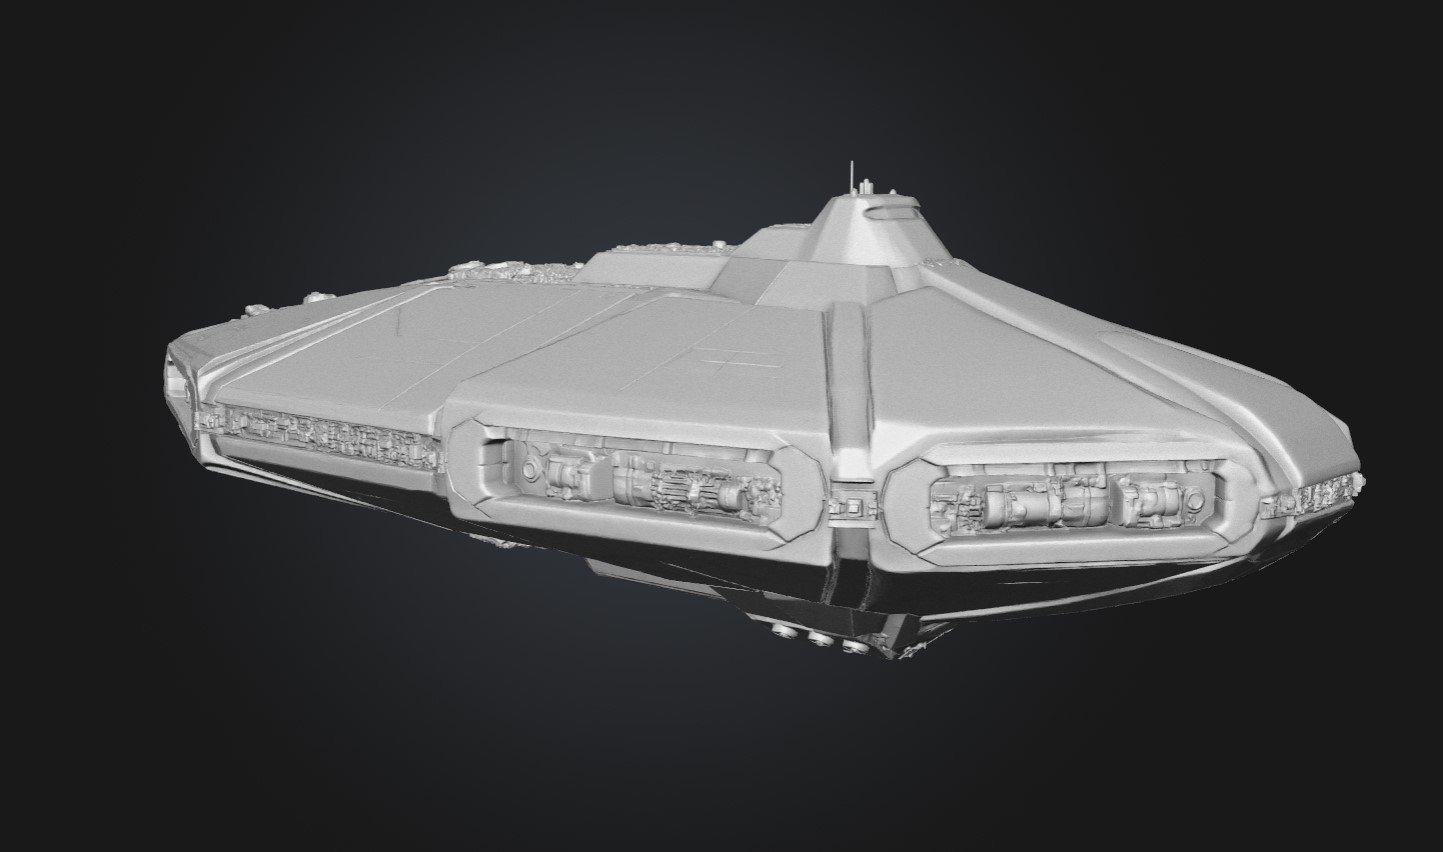
Meshy's mass — beauty.
This is the step that gives me my mass. This mesh is the "ready for Blender" point. I feel that the proportions came out OK; everything else — the surfaces, the panelling, the mesh itself — didn't. It's a block to build against, and nothing more.
Meshy to Photoshop
I took M01 back into Photoshop for a quick comparative check.
My main concern was the top profile. This is certainly not a required step in the chain, but in this case I want to do it because I will be adjusting the base target mesh in Blender to get some of the profile shape back, and I want to have a look at it in more detail.
This is simply overlaying the sketch onto the screenshot of the Meshy model.
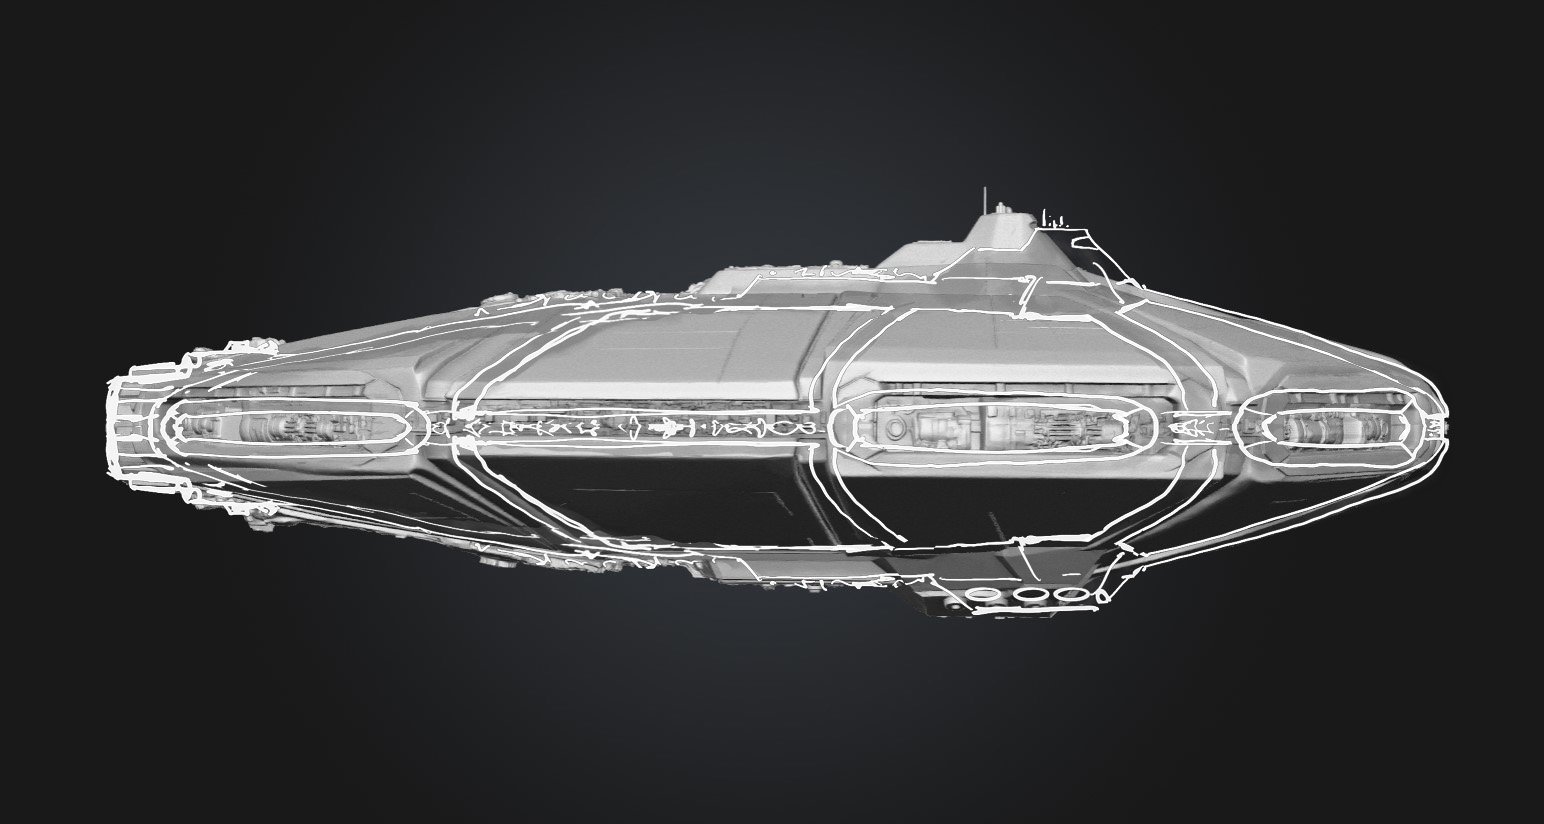
M01 compared to the sketch — profile.
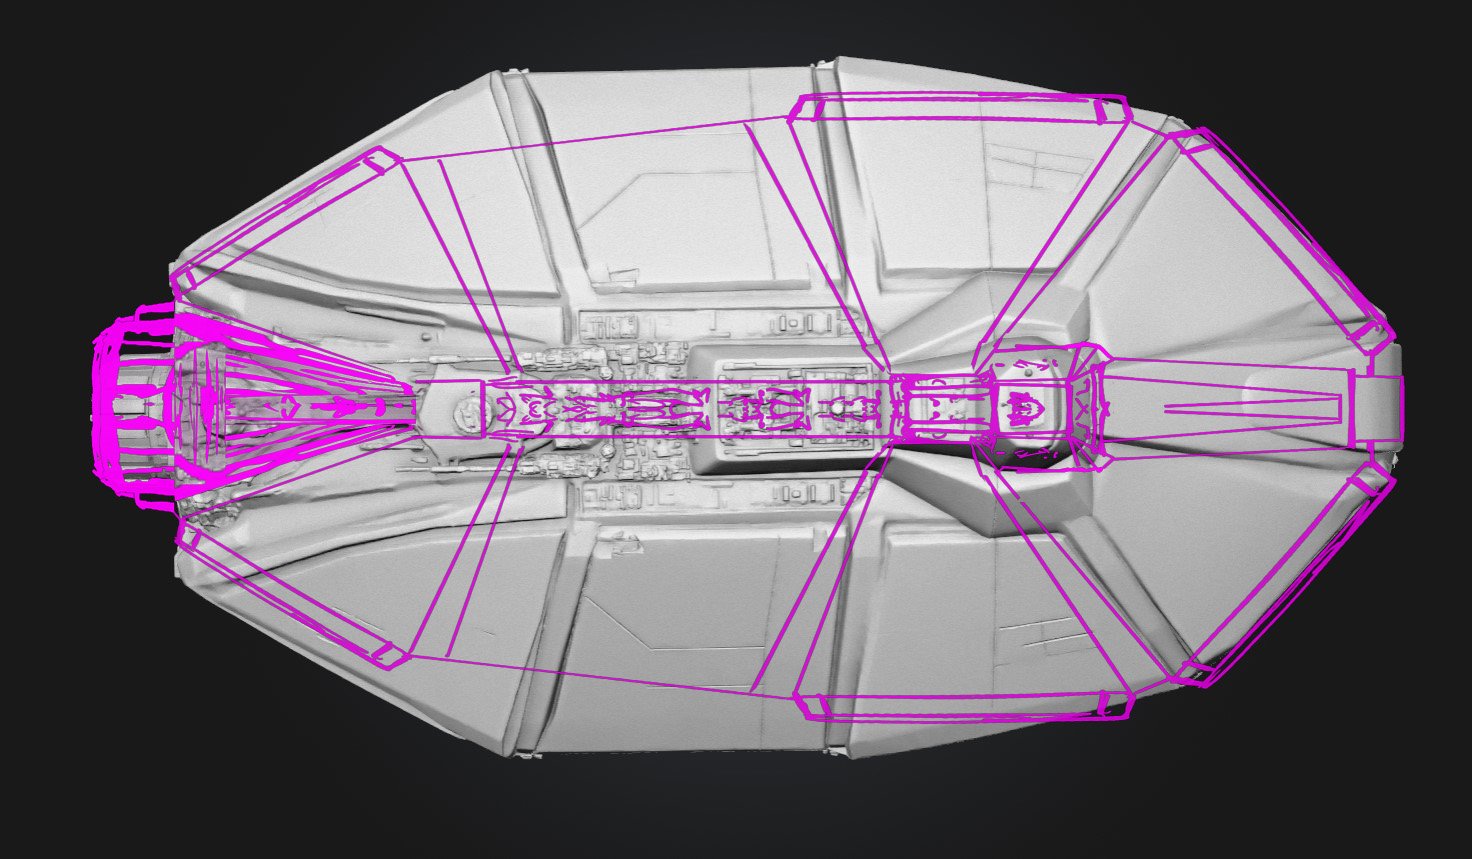
M01 compared to the sketch — plan.
One detail that has come out of this comparison is that the bridge stands a bit more "proud" on the mesh than in the sketch. This may or may not be something I change. Adjusting the taper is something I will change.
Rebuilt in Blender
Then the real work starts. I will rebuild the hull from scratch, by hand, as one clean mesh — the greebles (the little glued-on bits of surface detail: pipes, shapes, bumps) will be added for detail. The edges will be rounded to give it that styrene feel. None of the work from Seedream or Meshy will be in the final result.
At the time of posting this, I have not yet opened Blender on this model. The heavy fighter is currently occupying that hangar, and I have other things to do, but I will update this log when I do. I wanted to be transparent about how and where I use any generative assistance, and I didn't want to delay the log posting any longer, so that last step will have to wait.

Coming soon.
Summary and a thought on humans
I am only reverting to the use of these tools out of necessity. Many of the steps and the obvious misinterpretations would never happen when dealing with a competent artist.
We are currently seeking funding, both public and private. We have reached out and are in negotiations with partners and artists. When (not if!) we find some funding, or our bootstrap plan kicks in, we will be hiring artists — and human ones at that — to take over all these steps. And, for what it's worth, I really enjoy the entire design and modelling phase… but I just can't afford to spend that time right now on doing only that. I'll have to suffer through just being able to design and do the final build.
So the shape of it is hand, machine, machine, hand. The two generative steps save time in the middle; the design and the ship are both mine at either end. Right now the carrier's at the handover — the rough block, waiting on the rebuild.
Next: the rebuild — once the heavy fighter is out of the hangar.